
「Googleキーワードプランナー 」とは、Googleが提供するキーワードリサーチツールです。
Google検索エンジンでどのようなキーワードが人気なのかを無料で調べることができます。
人気のキーワードを組み込むと検索されやすくなりSEO対策にも効果的です。
うまく活用してサイトのアクセス数アップを狙いましょう!
さっそく使い方を紹介していきます。
利用するためにはGoogle広告アカウントが必要
Googleキーワードプランナーを利用するためにはGoogle広告アカウントが必要です。
以下の手順で広告アカウントを作成しましょう。
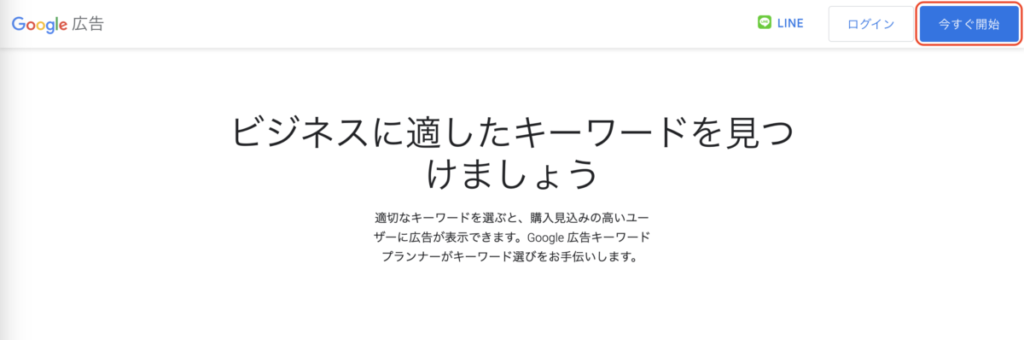
「Googleキーワードプランナー 」の公式サイトに移動し、画面右上の「今すぐ開始」ボタンをクリックします。
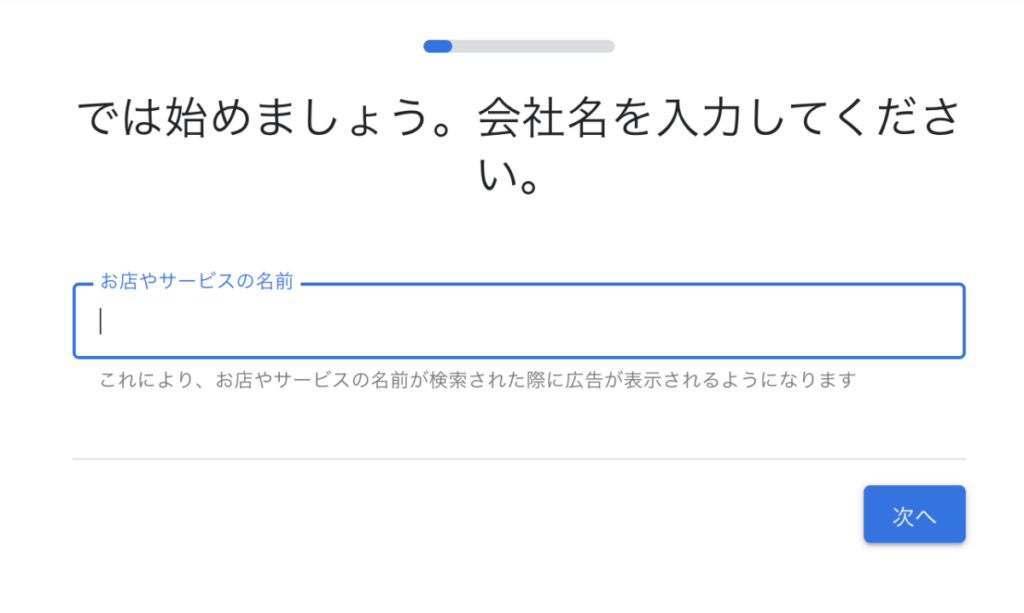
「お店やサービスの名前」にブログ名を入力し、「次へ」をクリックします。
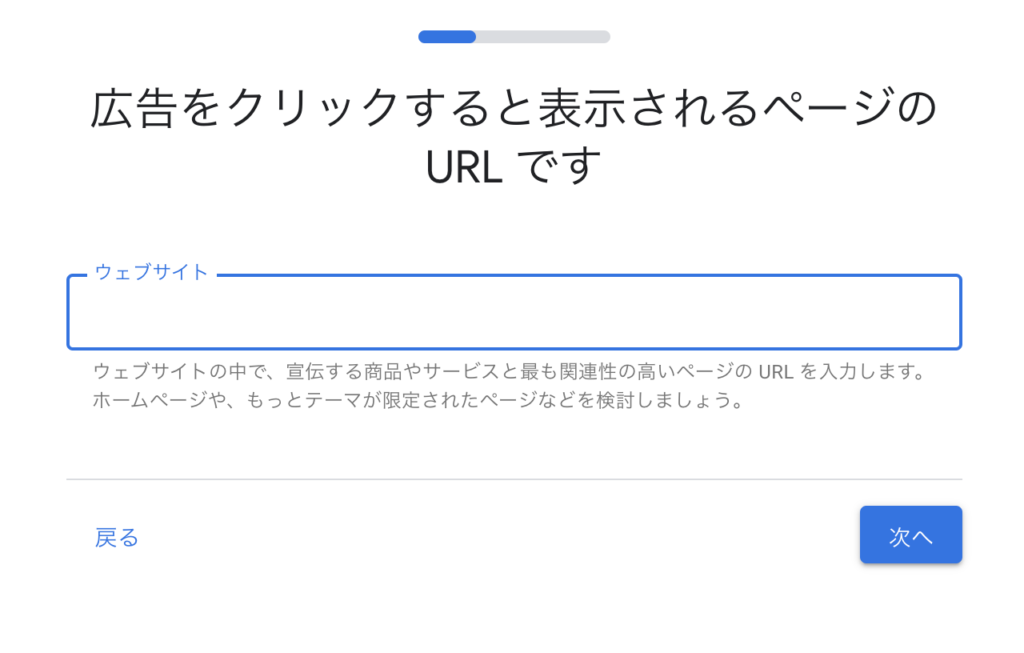
ご自分のサイトのURLを入力し、「次へ」をクリックします。
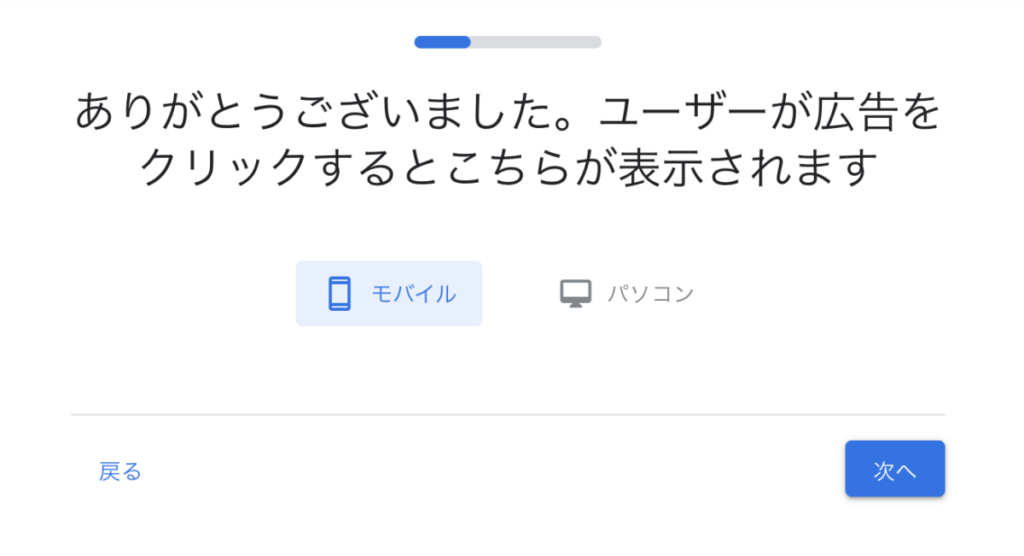
確認画面です。「次へ」をクリックします。
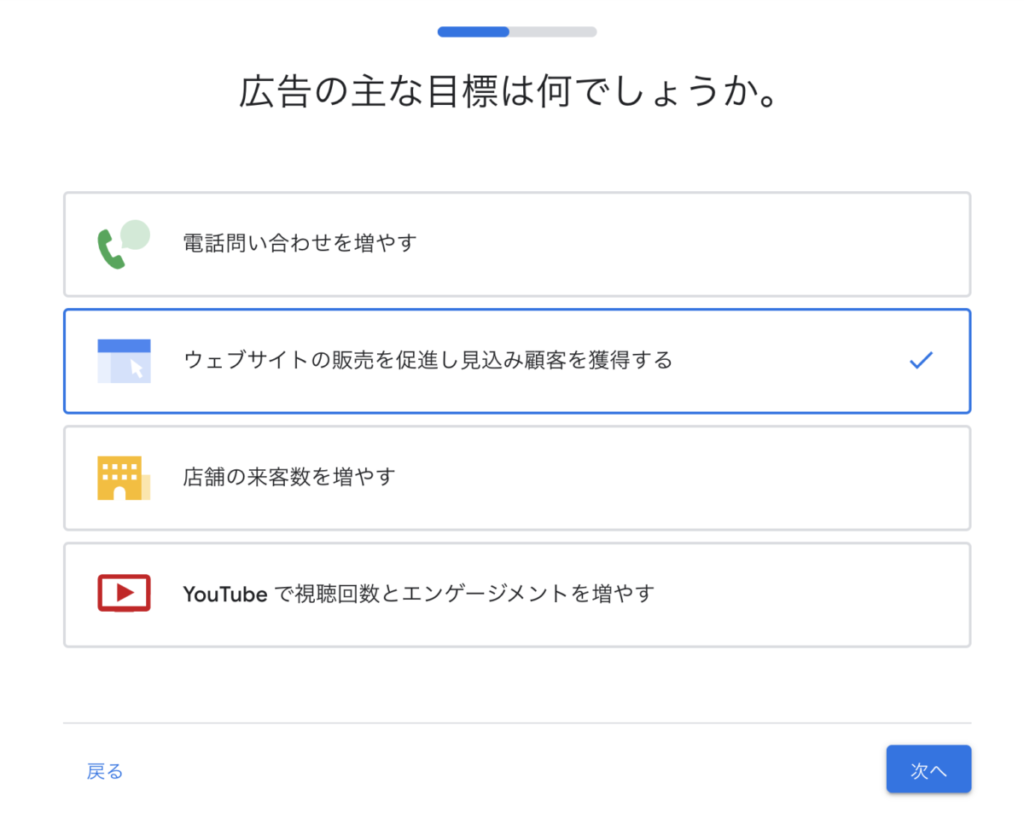
広告の目的を選択します。お好きなものを選んでください。
画像の例では「ウェブサイトの販売を促進し見込み顧客を獲得する」を選択しました。
選択したら「次へ」をクリックします。
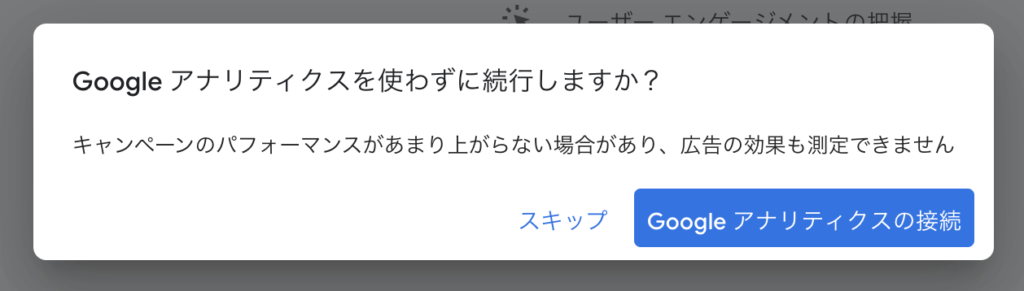
Googleアナリティクスの導入を聞かれますが「スキップ」で問題ありません。
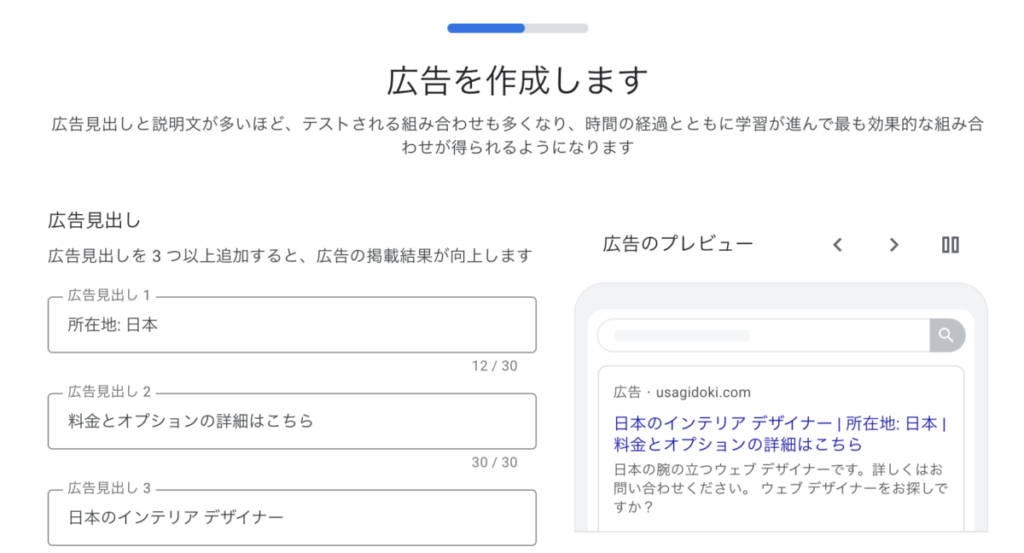
広告アカウント作成のために必要な広告を作成します。
Googleキーワードプランナーを利用するだけであれば内容は初期表示のまま編集しなくて大丈夫です。
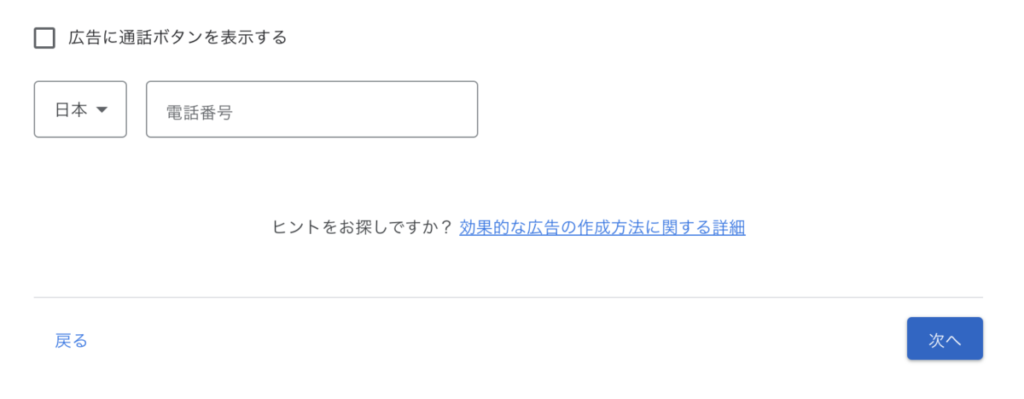
念のため、「広告に通話ボタンを表示する」のチェックは外しておきましょう。
キーワードテーマを追加します。
先ほどと同様に広告を配信しない場合は適当で構いません。
おすすめのキーワードから1つ選択しましょう。
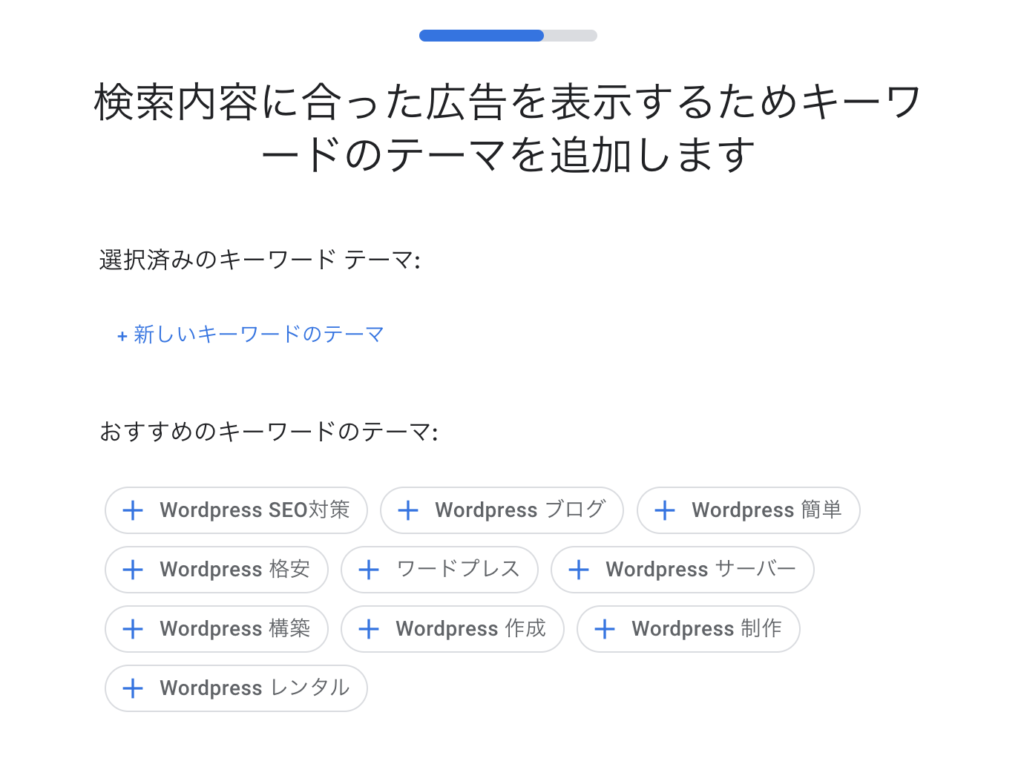
テーマを選択したら「次へ」をクリックします。
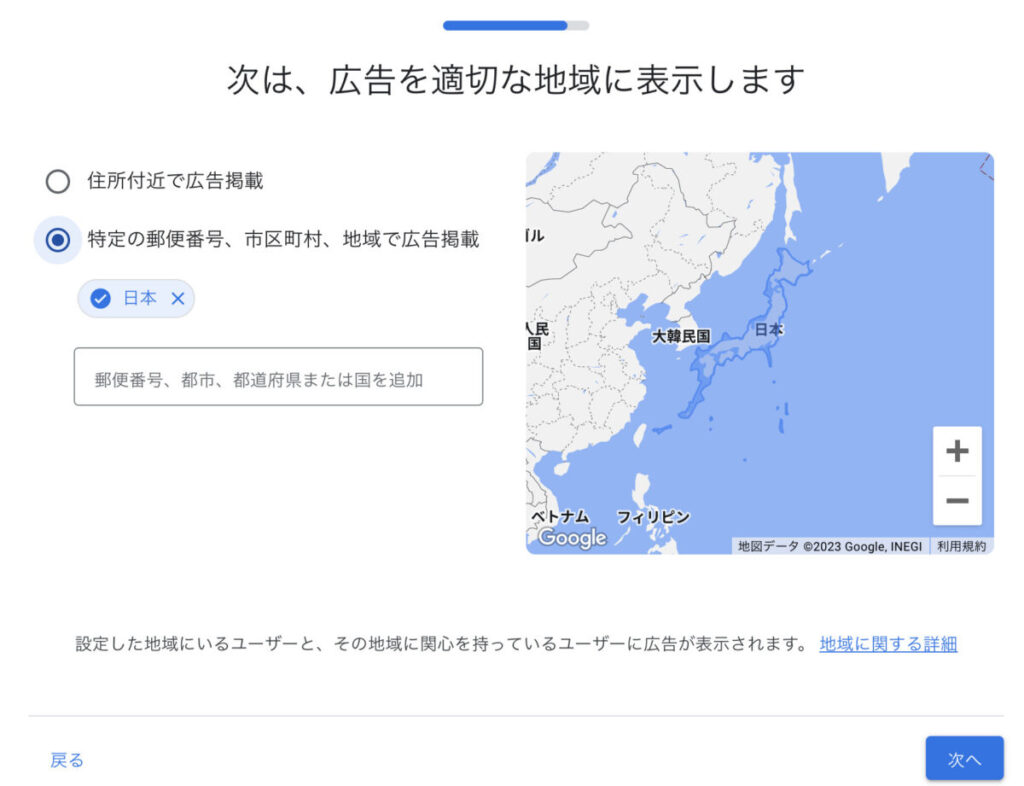
広告の配信地域を選択します。
広告の配信をしない場合は編集の必要ありません。「次へ」をクリックしてください。
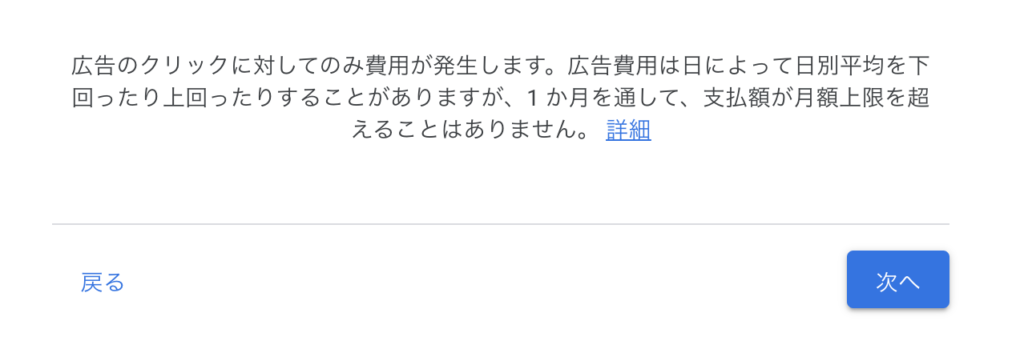
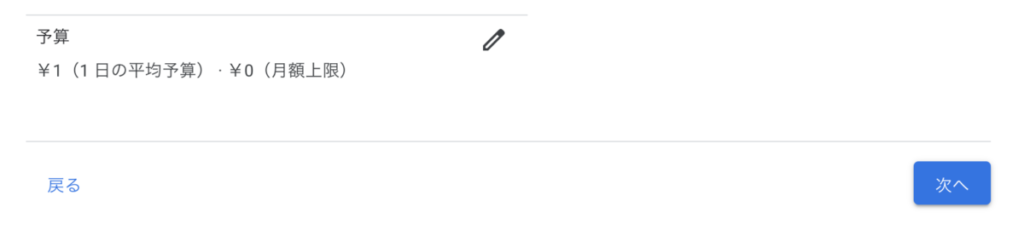
広告予算を設定します。
配信をしない場合は初期表示のままで問題ありません。
※2023年4月時点では「¥1」となっていましたが、金額があまりにも高い場合は事故防止のためにも金額を下げてください。
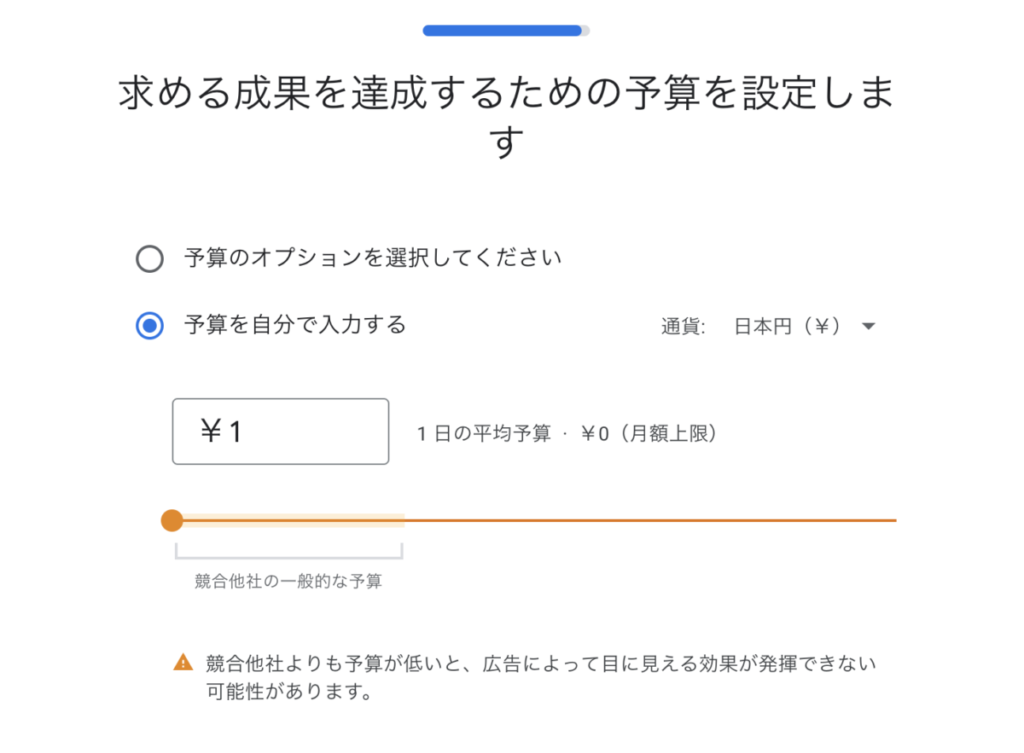
予算の設定を確認したら「次へ」をクリックします。
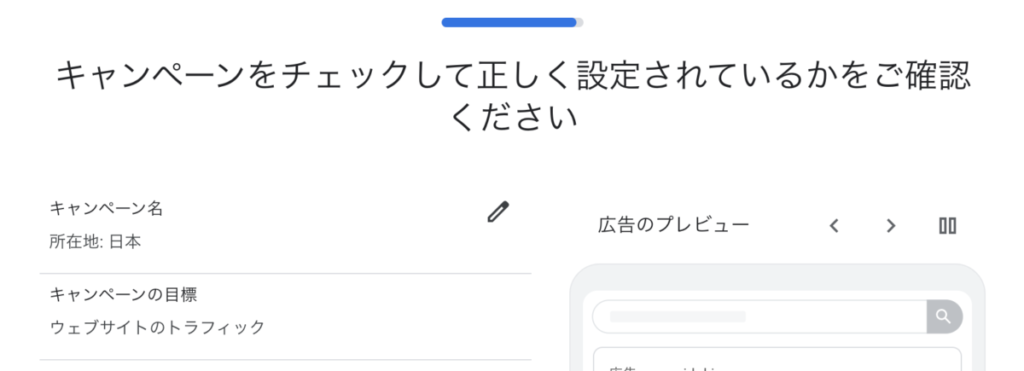
確認画面です。「次へ」をクリックします。
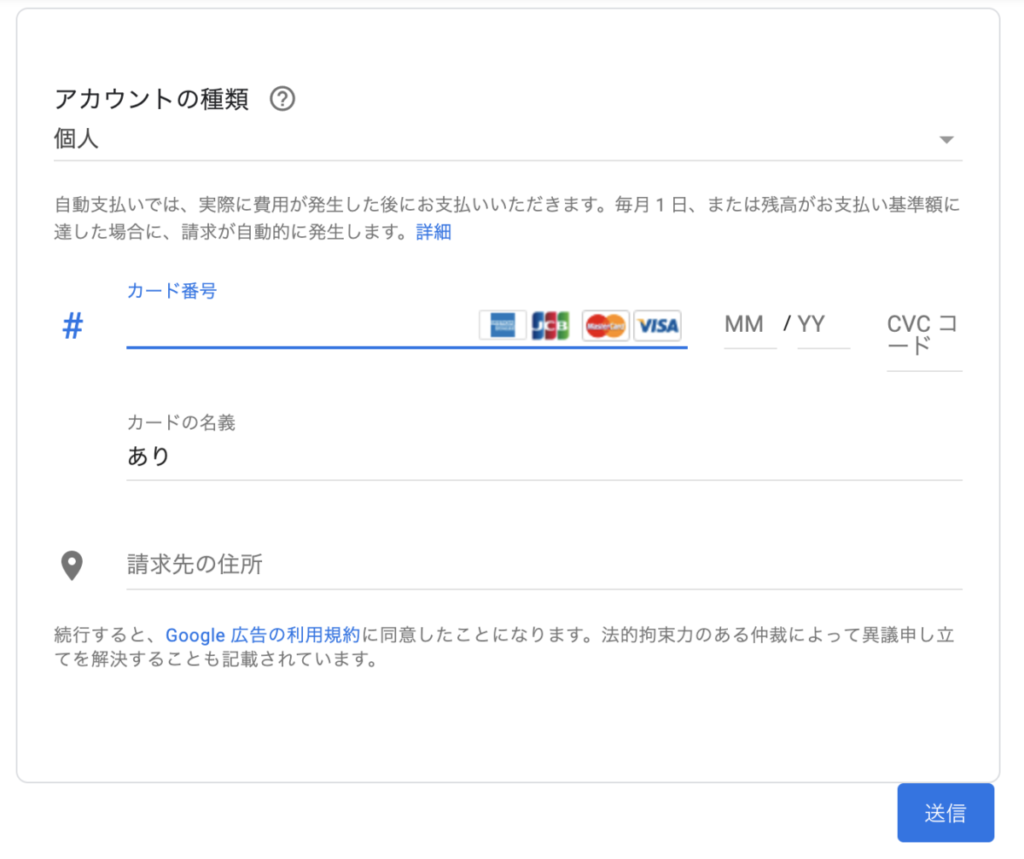
お支払い情報を入力します。
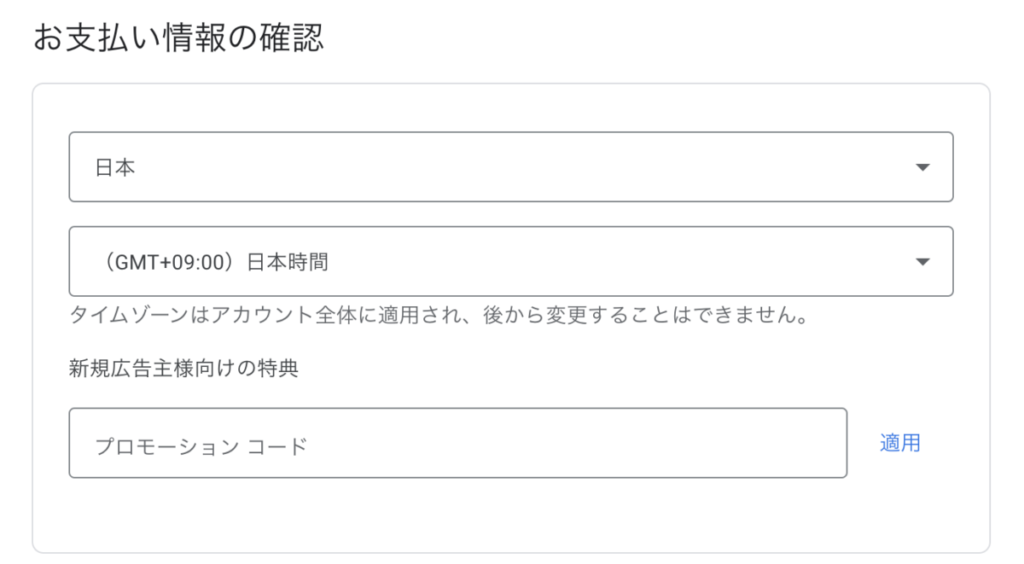
アカウントの種類は「個人」と「組織」があります。ご自分の環境に合うものを選んでください。
入力できたら「送信」ボタンをクリックします。
この後、お支払い情報の確認ページに進みますので内容に問題なければ「送信」ボタンをクリックします。
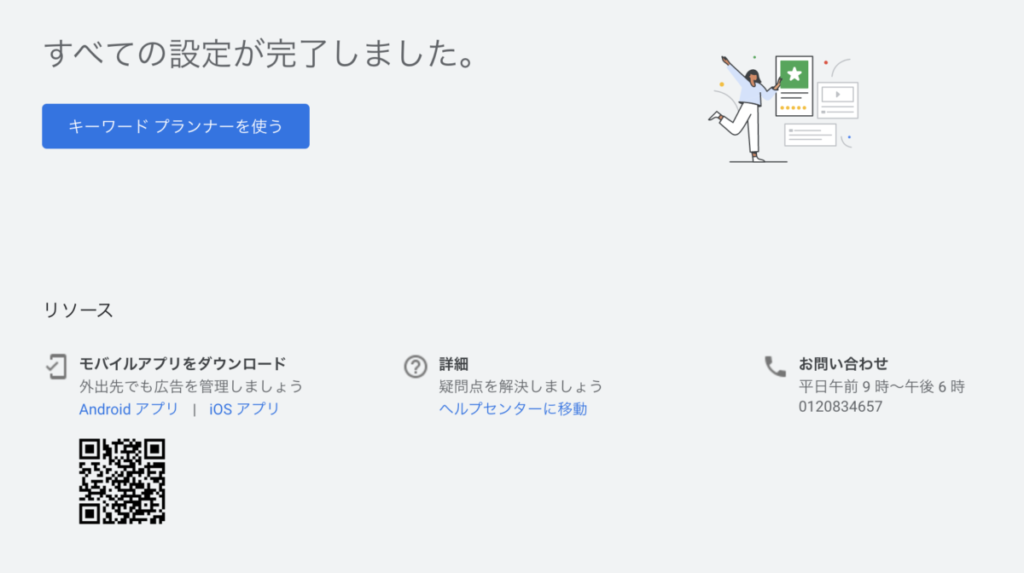
以上で広告アカウントの登録は完了です。
キャンペーンを削除しよう
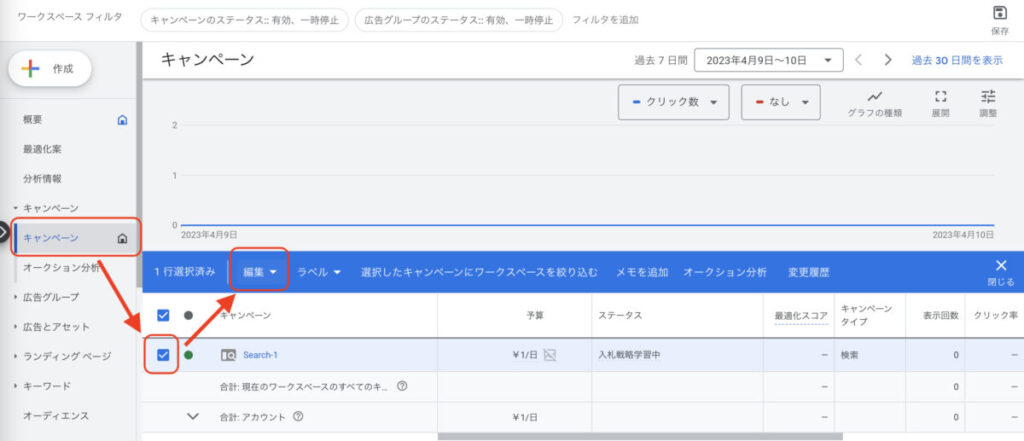
広告の配信をしない場合は、アカウント登録後にキャンペーンの削除を行なってください。
左のメニューよりキャンペーンの一覧画面を開きます。
削除したいキャンペーンを選択し「編集」をクリックしてください。
メニューが表示されるので「削除」をクリックします。
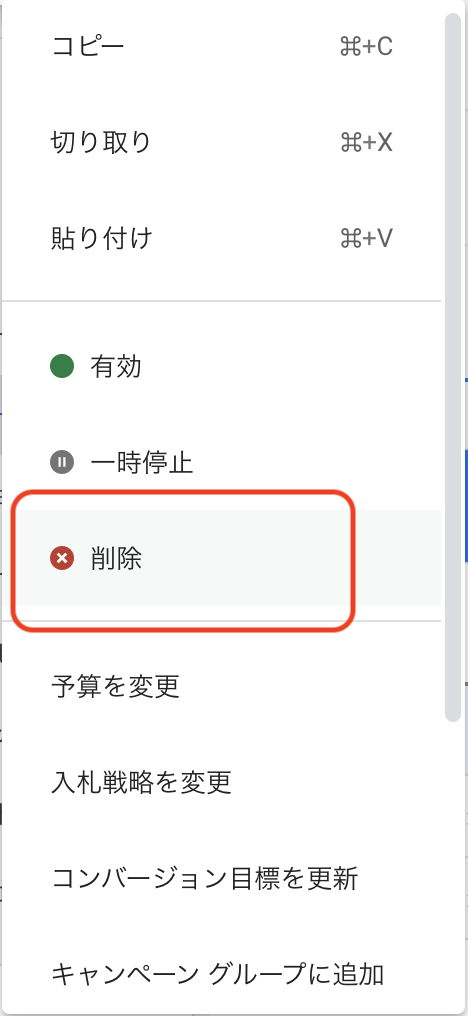
確認ダイアログが表示されます。「確認」ボタンをクリックしましょう。
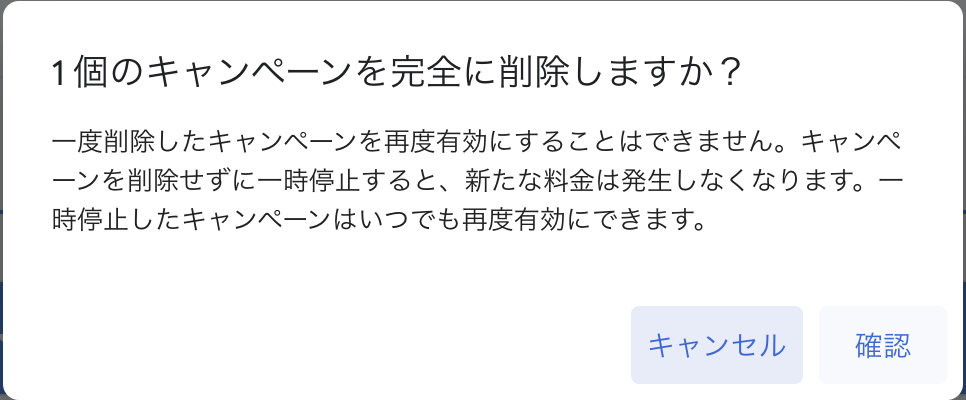
「有効なキャンペーンはありません」と表示されたら完了です。

Googleキーワードプランナーの使い方
Googleキーワードプランナー画面に移動します。
先ほどの手順から進む場合は画面上部の「ツールと設定」 > 「キーワードプランナー」をクリックしてください。

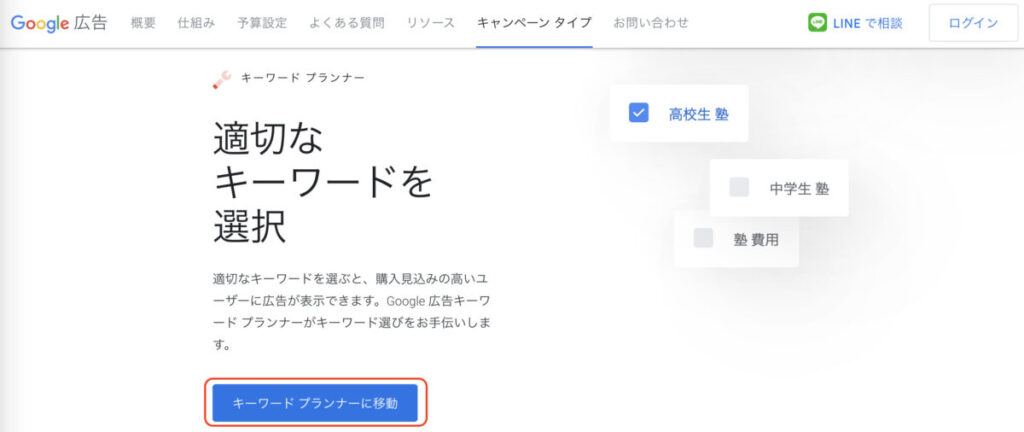
トップ画面から移動する時は「Googleキーワードプランナー 」の「キーワードプランナーに移動」ボタンをクリックしましょう。
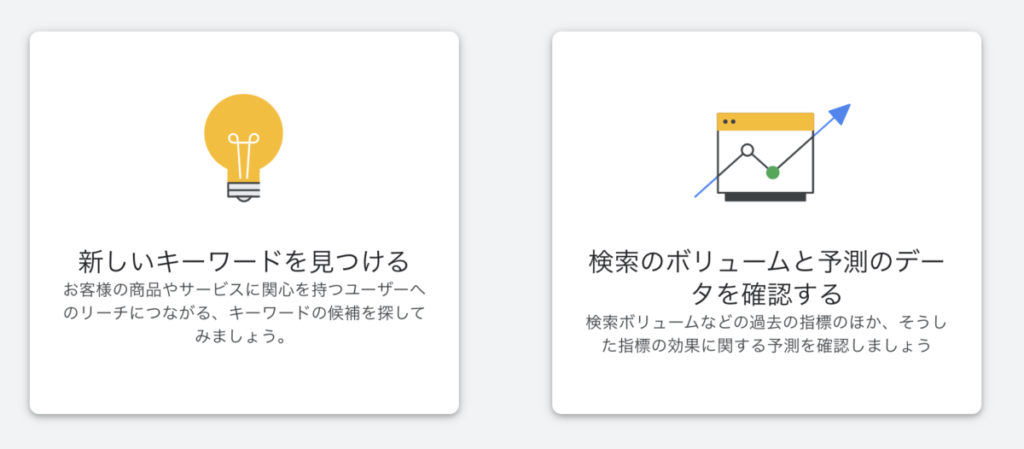
「新しいキーワードを見つける」を選んでください。
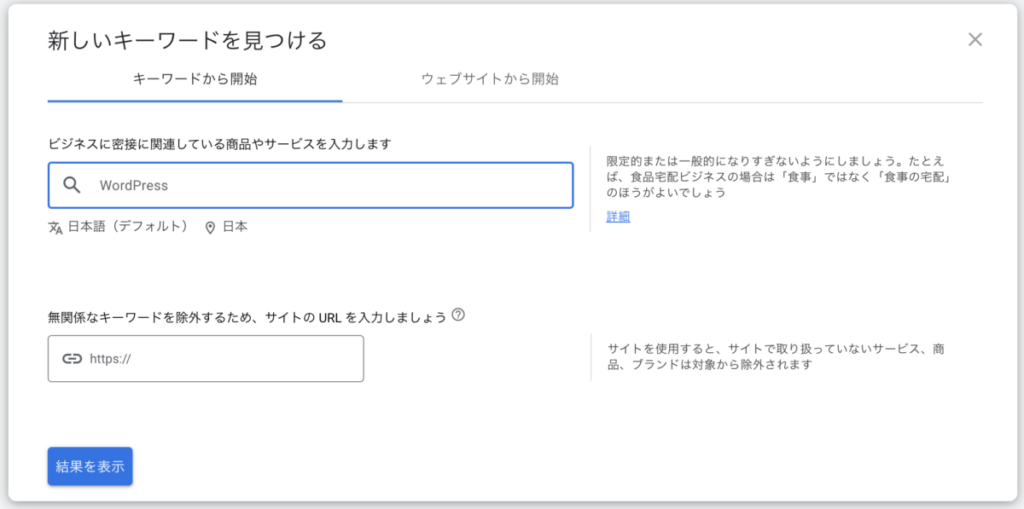
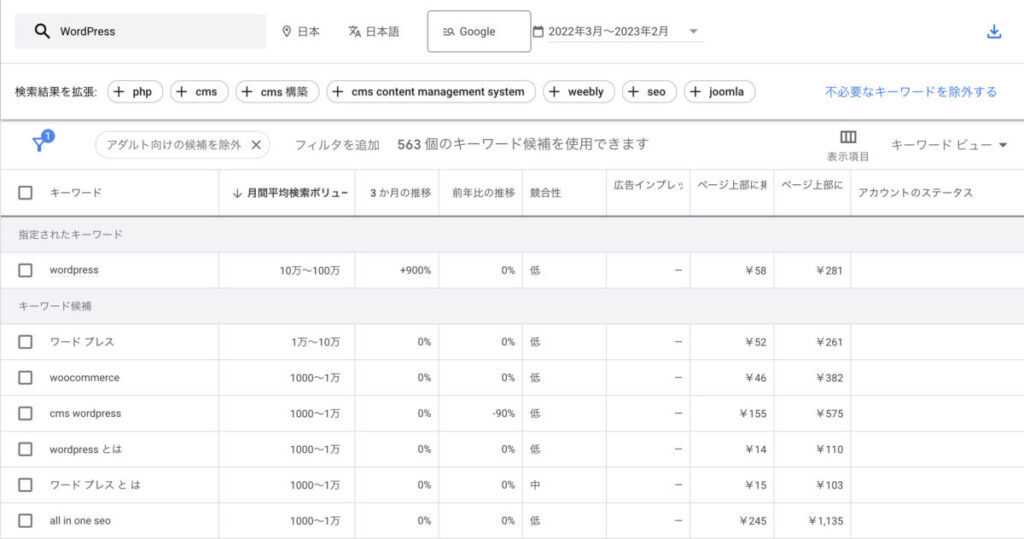
探したいキーワードを入力しましょう。
ここでは「WordPress」と入力してみました。
自身のサイトを除外する場合はURLも併せて入力してください。
入力できたら「結果を表示」をクリックします。
キーワード候補が表示されました。
「wordpress とは」「ワードプレス とは」といったキーワードが多く検索されている事がわかります。
記事で扱うキーワードがどれだけ検索されているか目安になるので、ぜひ活用していきましょう。
補足
キーワードが1つだけだと検索ボリュームが大きくなり、競合もそれだけ増えるため検索上位に表示するのが難しかったりします。
もう少し具体的にキーワードを絞り込んでみましょう。
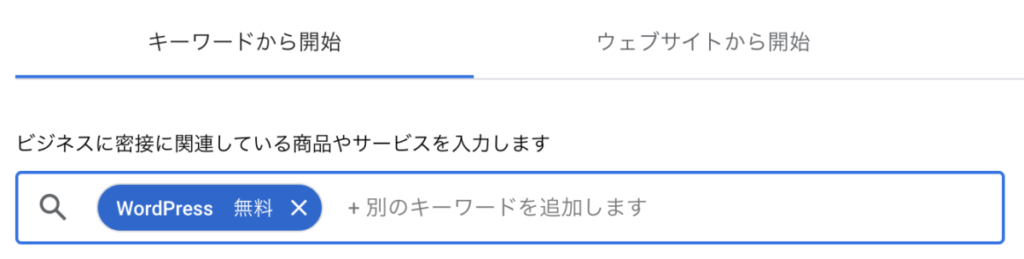
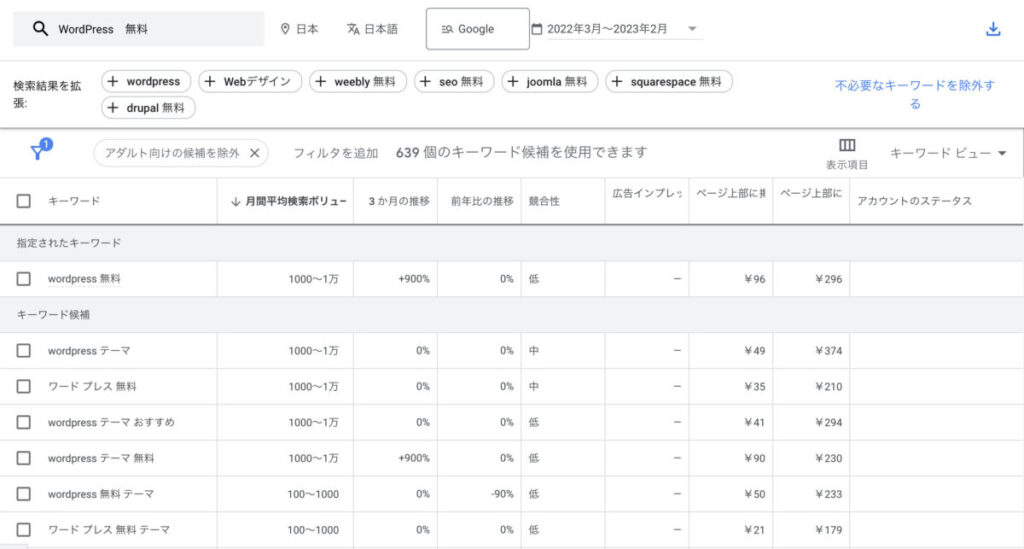
ここでは「WordPress 無料」としてみました。
するとWordPressのテーマに関する検索が多い事が分かります。
さらに「WordPress 無料 テーマ」で絞り込んでみましょう。
「おしゃれ」「シンプル」「SEO」というキーワードが出てきました。
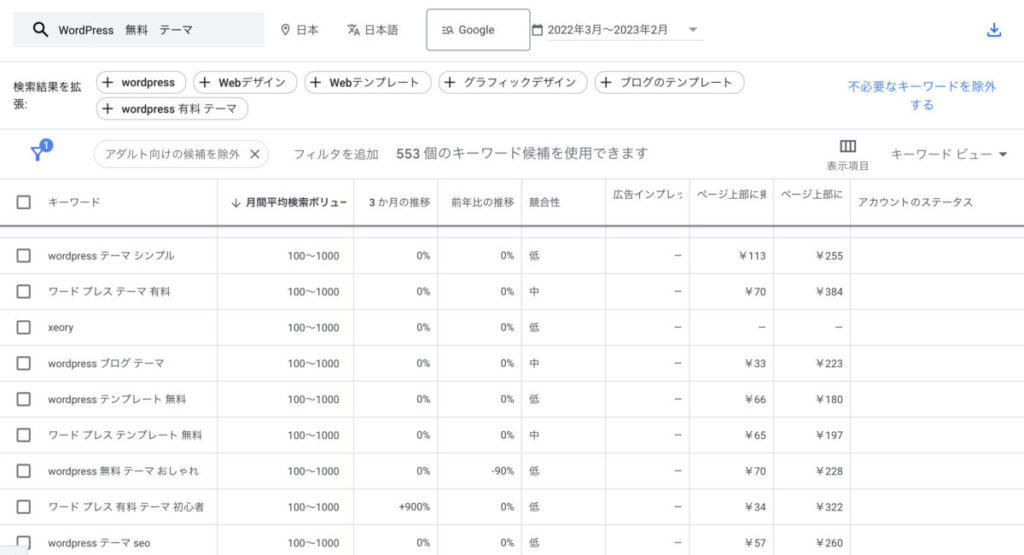
ここまで絞り込めると記事の方針が立てられそうです。
参考までに記事タイトルを考えてみました。
- 【無料でおしゃれなWordPressのテーマを紹介!】
- 【無料のWordPressテーマはSEO対策に有効なのか?】
まとめ
SEO対策を考える上でキーワードの選定は重要になってきます。
無料で簡単に使えるのでみなさんも是非使ってみましょう!