
Vue.jsとFirebaseを使って、Webアプリを作成する方法を紹介します。
後編ではFirebaseを導入してデプロイを行いホスティングされるところまでを解説します。
前編はこちら

環境
- Node.js:20.18.0
- create-vue:3.11.1
- vite:5.4.9
- firebase-tools:13.23.0
Firebaseプロジェクトの作成
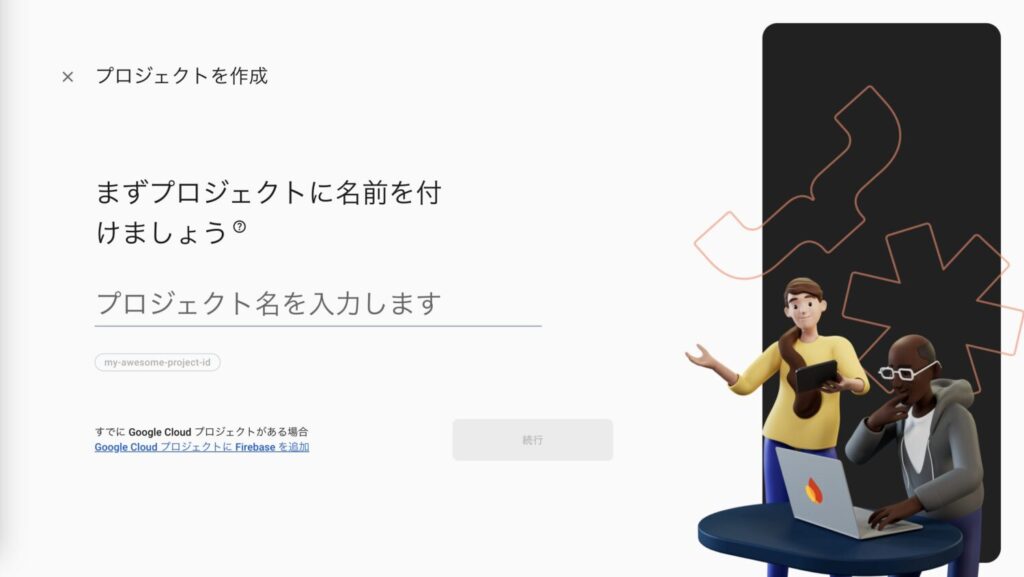
Firebaseのコンソールに移動し、「Fisebaseプロジェクトを使ってみる」をクリックします。

プロジェクト名を入力し、「続行」をクリックします。
Googleアナリティクスを利用するかどうかを選択します。
アナリティクスのアカウントが必要になりますが、手間であれば無効で大丈夫です。
有効か無効かを選択したら「続行」をクリックします。

プロジェクトの作成が開始されますので1分ほど待機。

しばらく待つとプロジェクトの作成が完了します。
「続行」をクリックします。

WebアプリにFirebaseを追加
プロジェクトの作成完了画面で「続行」をクリックするとコンソールに戻ってきます。
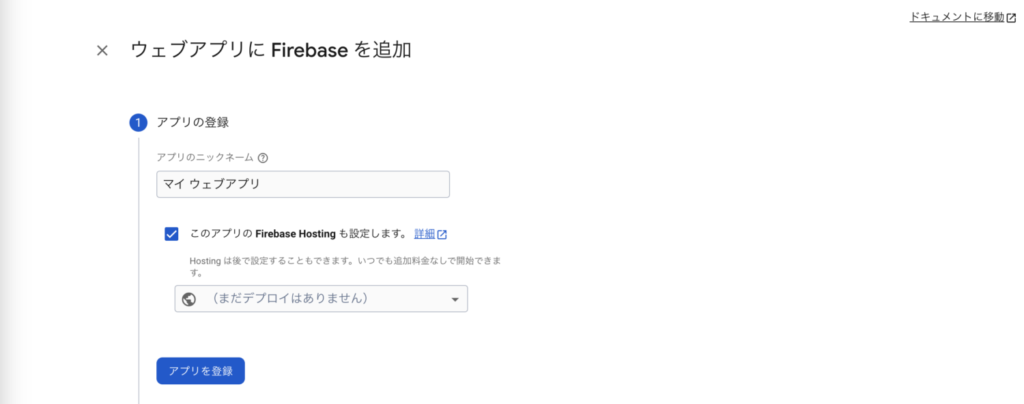
コンソールにある「アプリに Firebase を追加して利用を開始しましょう」の項目の「ウェブ」をクリックします。

アプリの登録
Firebase上で識別するためのニックネームを登録します。
続いて「このアプリの Firebase Hosting も設定します。」にチェックを入れたら「アプリを登録」をクリックします。
Firebase SDK の追加
ターミナルで下記コマンドを実行して、FirebaseのSDKをインストールします。
npm install firebaseapiキーが表示されますが今回は使用しません。
後から必要になった場合はプロジェクトの設定画面から確認することもできますので飛ばして大丈夫です。
「次へ」をクリックします。
Firebase CLI のインストール
ターミナルで下記コマンドを実行して、Firebase CLIをインストールします。
インストールが完了したら「次へ」をクリックします。

Firebase CLI を使用するには、Node.js v18.0.0 以降が必要です。
インストールに失敗する場合はNode.jsのバージョンを見直してみてください。
npm install -g firebase-toolsFirebase Hosting へのデプロイ
ターミナルで下記コマンドを実行して、ログインを行います。
Firebase CLI のインストール後にfirebaseコマンドが実行できない場合、
一度ターミナルを再起動してみてください。
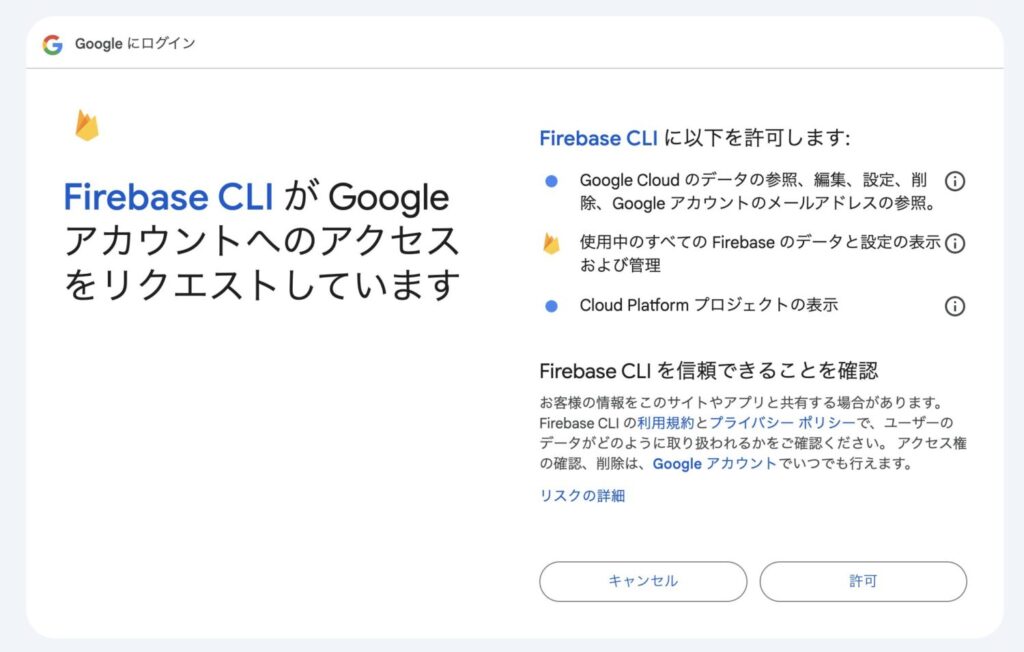
firebase login製品の改善に役立てるための情報収集を許可するかの質問が出ますので回答します。
回答するとブラウザにてGoogleのログイン画面に遷移しますので、ログインを実行してください。
? Allow Firebase to collect CLI and Emulator Suite usage and error reporting
information? (Y/n)
アクセス許可を求められるので、「許可」をクリックします。
ログインが完了するとターミナルでSuccessと表示されます。
✔ Success! Logged in as sample@email.com引き続き、ターミナルで下記コマンドを実行してプロジェクトを開始します。
このコマンドはアプリのルート ディレクトリから実行してください。
firebase initプロジェクトが開始されました!
     ######## #### ########  ######## ########     ###     ######  ########
     ##        ##  ##     ## ##       ##     ##  ##   ##  ##       ##
     ######    ##  ########  ######   ########  #########  ######  ######
     ##        ##  ##    ##  ##       ##     ## ##     ##       ## ##
     ##       #### ##     ## ######## ########  ##     ##  ######  ########

You're about to initialize a Firebase project in this directory:

  /Users/user/workspace/project
続いて、どのFirebase機能を設定したいか聞かれるので、必要な機能を選択します。
スペースキーで選択のON/OFFが切り替えられます。決定はエンターキーです。
今回はホスティングとデプロイを行いたいので、Hosting: Configure files for Firebase Hosting and (optionally) set up GitHub Action deploysを選択します。
? Which Firebase features do you want to set up for this directory? Press Space to select features, then Enter to confirm your choices. (Press <space> to
select, <a> to toggle all, <i> to invert selection, and <enter> to proceed)
 ◯ Data Connect: Set up a Firebase Data Connect service
 ◯ Firestore: Configure security rules and indexes files for Firestore
 ◯ Genkit: Setup a new Genkit project with Firebase
 ◯ Functions: Configure a Cloud Functions directory and its files
❯◯ Hosting: Configure files for Firebase Hosting and (optionally) set up GitHub Action deploys
 ◯ Storage: Configure a security rules file for Cloud Storage
 ◯ Emulators: Set up local emulators for Firebase products
Firebaseプロジェクトとの連携を行います。
今回はコンソールから作成済みなので、Use an existing projectを選択します。
=== Project Setup

First, let's associate this project directory with a Firebase project.
You can create multiple project aliases by running firebase use --add,
but for now we'll just set up a default project.

? Please select an option: (Use arrow keys)
❯ Use an existing project
  Create a new project
  Add Firebase to an existing Google Cloud Platform project
  Don't set up a default project
Firebaseのプロジェクト一覧が表示されますので、紐づけたいプロジェクトを選択します。
? Select a default Firebase project for this directory: (Use arrow keys)
❯ project (project)
hogehoge (hogehoge)
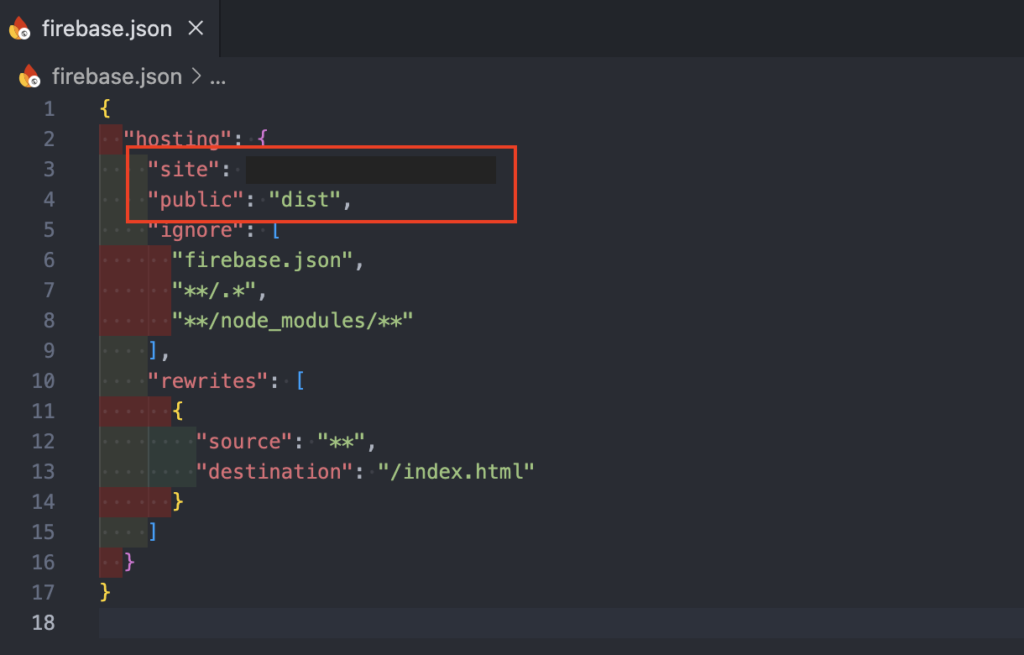
fugafuga (fugafuga)デプロイ時にアップロードするHostingアセットを格納するフォルダを指定します。
デフォルトではpublicとなっていますが、Vueではビルド時に作成されるファイルはdistフォルダに格納されるので、(public)をdistに修正してください。
間違ってそのまま進んでしまっても後からfirebase.jsonを修正すれば大丈夫です。
=== Hosting Setup

Your public directory is the folder (relative to your project directory) that
will contain Hosting assets to be uploaded with firebase deploy. If you
have a build process for your assets, use your build's output directory.

? What do you want to use as your public directory? (public)
後から修正したい場合
プロジェクトフォルダをVSCodeなどで開き、firebase.jsonのpublicを"dist"にしてください。
SPAの構成にするかを選択します。
? Configure as a single-page app (rewrite all urls to /index.html)? (y/N) 自動ビルド・デプロイをするかを選択します。
? Set up automatic builds and deploys with GitHub? (y/N) これでFirebaseの初期化が完了です。
i  Writing configuration info to firebase.json...
i  Writing project information to .firebaserc...

✔  Firebase initialization complete!
デプロイ
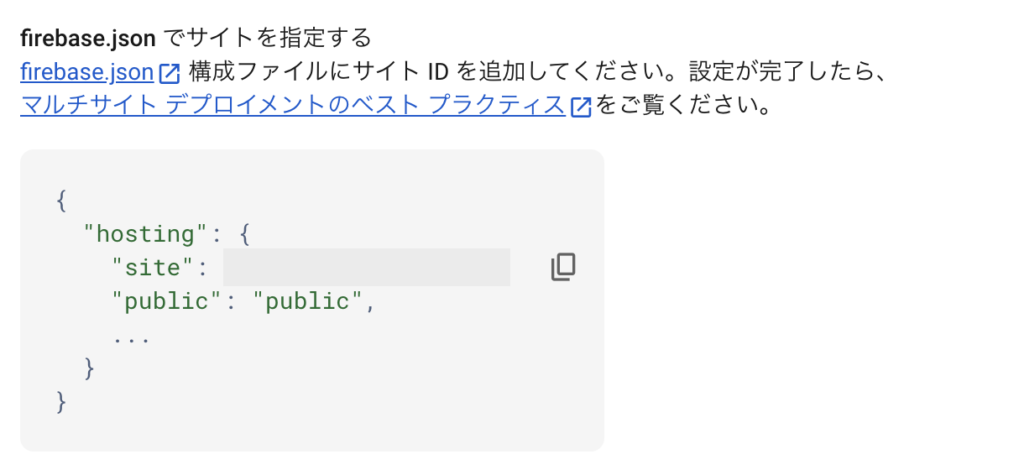
続いてfirebase.jsonを編集します。
firebase.jsonはプロジェクトルート直下にありますのでVSCodeなどで開き編集してください。
内容はブラウザと同じになるように修正します。
ただし、publicはdistのままで大丈夫です。
Vueファイルをビルドします。
プロジェクトルートディレクトリでnpm run buildを実行。
npm run buildいよいよデプロイです。
プロジェクトルートディレクトリでブラウザのコマンドを実行します。
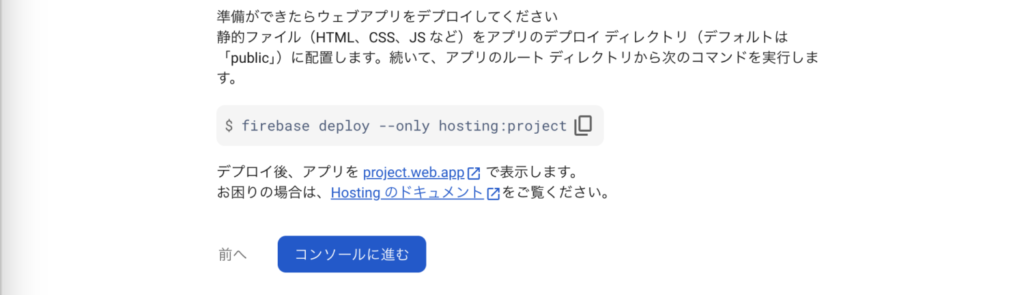
firebase deploy --only hosting:projectデプロイが完了すると、Hosting URLが表示されますのでブラウザでアクセスします。
=== Deploying to 'usagi-project'...
...
✔ Deploy complete!
Project Console: https://console.firebase.google.com/project/project/overview
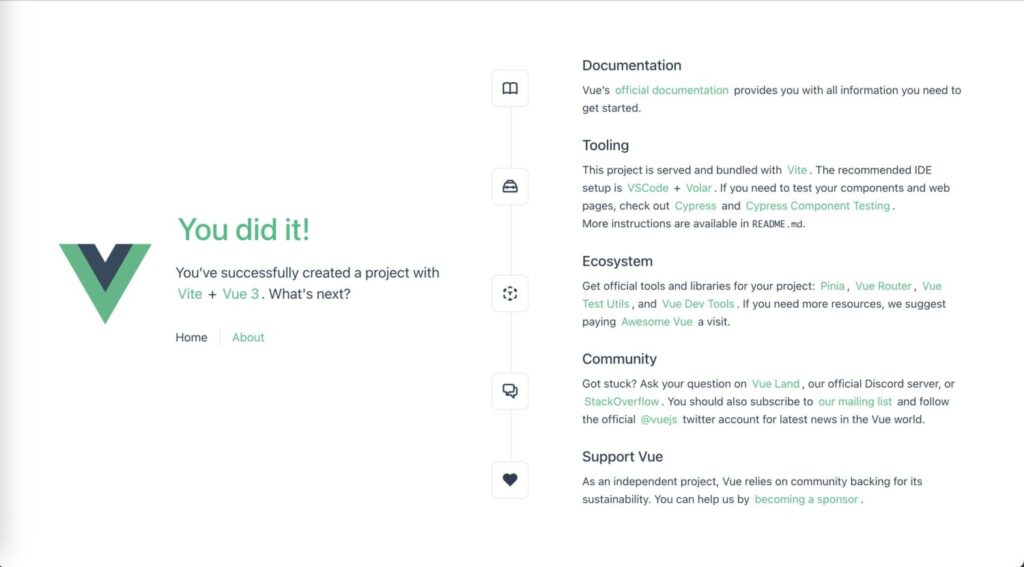
Hosting URL: https://project.web.app画面が表示され、ホスティングされていることを確認できました!
まとめ
お疲れ様でした!
これで、Vue.jsとFirebaseを使ったWebアプリの作成からデプロイまでの流れが完了しました。
Firebaseを利用することで、アプリケーションのホスティングが簡単になり、運用がスムーズに行えます。